Why sow seed?
Sowing seed is one of the most easy, satisfying and cheap ways to get growing. March is the perfect time of year to start the majority of seed sowing. Some people start early in autumn, some start seeds off in January or February, but don’t panic if you haven’t done this – March is fine, especially if you don’t have a glasshouse or protection. It should be starting to get a bit warmer which means that seeds germinate faster and you’ll soon catch up.
Most of the seeds we sow at Hestercombe are annual flower seeds, meaning that in one year the seed will germinate, grow, flower, go to seed and then die. We use them to fill any gaps in the garden. Like Gertrude Jekyll, we don’t like to see bare soil. Jekyll seemed to follow the philosophy that more is more, so we know she would want an abundance of plants!
For peat's sake!
We use peat-free seed sowing compost which is lighter and finer than other composts. It's normally made of a mixture of coir (made from coconut husks), bark and compost. The compost needs to be low in nutrients and have good drainage, but at the same time hold enough water. The seeds themselves have enough nutrients and energy stored to be able to germinate and provide the first leaves of germination, as long as they have access to light and water.
Once they've produced their first true leaves they're ready to be pricked out into a compost with more nutrient content, sometimes called ‘potting on compost’.
'Tray bien': preparing seed trays
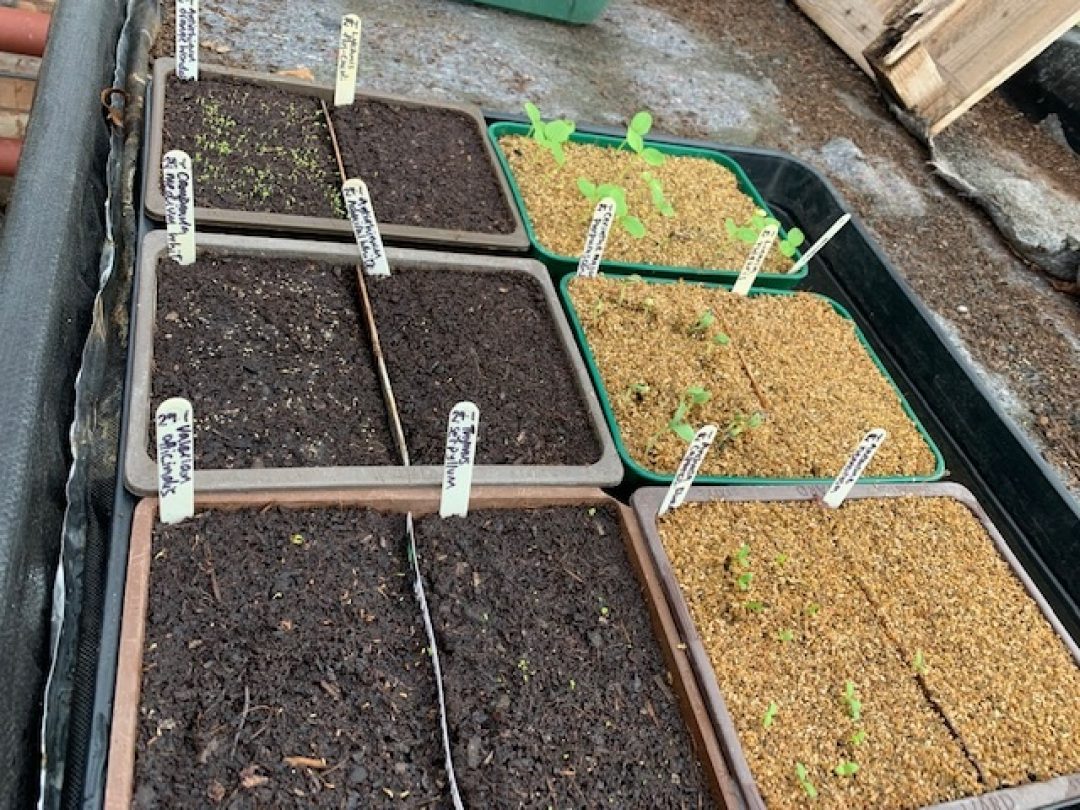
Most of our seed is sown into trays but if we have larger seed we sometimes put it straight into a small pot. To prepare a seed tray, overfill the tray with compost and, using a board, make a sawing motion left to right across the tray. This will take off any excess compost whilst keeping it even. Then press the compost down with a board. I like to water now, that way the water doesn’t disperse the smaller seeds.
Put the seeds in the crease in the palm of your hand (or in the crease of a piece of paper) and tap the palm of your hand to scatter the seeds. I use a south-north, east-west pattern to make sure that the area is covered. Do not over seed, as this will just lead to diseases later on. Now using a sieve, cover lightly with compost or vermiculite.
The importance of labelling
AND MAKE SURE THAT YOU LABEL IT! We also like to write the date that the seed was sown so that you know when to give up if they haven’t germinated.
Once the seedlings are up and have their true leaves they will need to be pricked out to give them more room to grow. If they are overcrowded they become prone to disease. To combat this, prick them out from their tray into individual pots.
Fill the pot and ‘dib’ a hole in the centre. Use the dibber to lever the seedling out of the tray whilst pulling gently at the leaves. If you lift them by the stem you squash their phloem and xylem, which transport water and nutrients and may cause damage. Holding the leaves, put the seedling in the hole and firm down the soil with the dibber. You will always have loads more seed and seedlings than you need so share among your neighbours! I promise you that you don’t need 50 tomato plants, and what will you do with your 100 Cosmos?
Once the plants have put on good growth and have a good root system they will be ready to harden off before you plant them out. Hardening off just means getting them used to the outside temperature if they have been grown under cover. If you have cold frames this is just a case of removing the lids in the day time if the temperatures are warm enough, and then remembering to close the lids at night as the temperature drops. Or placing your plants outside in the daylight hours and back inside at night.
Conclusion
Sowing seeds can add a great volume of plants to your borders and add great splashes of colour. It will also give you a source of seed to save for the following year and to share with friends.
So have a go!
Membership at Hestercombe
Join today and enjoy unlimited access to Hestercombe for a whole year
Described as “one of the top twenty gardens to visit in the country”, Hestercombe is always beautiful throughout the year. Join today and enjoy great value: unlimited access to Hestercombe with prices from £4.21 per month.
Your membership includes:
- Unlimited access to Hestercombe Gardens for a year from date of joining for the Member, guests and children according to membership type
- Unlimited 'bring a guest' privileges during March and September
- Half price entry for visitors accompanied by a Member of Hestercombe (one visitor per member)
- Free children's trails available throughout the year
- Special members’ discounts on many of our events throughout the year
- Our 'members first approach' with members receiving 24 hours priority booking for our most popular events, such as Mother's Day, The Bampfylde Lecture, workshops and most importantly, our winter events such as the Christmas Market, Father Christmas and ILLUMINATE
- Half price entry to our partner attractions: Abbotsbury Subtropical Gardens, Forde Abbey Gardens(half price garden entry only), The Bishop’s Palace, Wells(available for full membership only), The Garden House, Dartington Trust Gardens, Exmoor Zooand Glastonbury Abbey(half price garden entry only).
Give a Gift of Membership to friends and family and they too can enjoy all the benefits of membership.
See Membership Options
